
It has been 5 months since our last UI Designer’s experience in learning programming (1). Have you been practicing? Did you face any difficulties? If your programming lessons are progressing smoothly, it would mean that you’re a gifted designer with great potential. Without further ado, let’s delve into the next phase of our lessons. The contents we’ll go over today will be more difficult. You’ll need to invest more time and effort into learning this. I will therefore try to inspire fellow designers by sharing my personal experiences in the quest to master programming.
After learning basic HTML and CSS, the other key areas to focus on would be:
CSS hack
CSS optimization and security (SASS/css sprite/image compression/class name)
CSS Framework (bootstrap)
Version control (git)
CSS hack
When using a different browser, it would be intuitive to use CSS Reset to reset default parameters of various browsers to 0 and standardize them accordingly. The 2 most common CSS Reset available would be Reset CSS compiled by the renowned CSS Master Eric A. Meyer, while the other would be CSS Normalize. The major difference between the two is whether the HTML label styles are reset to zero (such as h1 to h6 styles). For details on these differences, you may refer to the normalize.css, which is considered an alternative to reset css.
However, even if we have loaded CSS Reset, taming IE may still prove difficult. There’s an undeniable sense of achievement every time we build a new style set. But any sense of pride vanishes instantly when that outdated IE window pops up. In order to ensure the integrity of your website, you must perform IE hack. IE hack allows you to clearly understand the nature of every version of IE. Familiarity over these nuances will ensure success.
Sometimes IE is not the only thing to blame. I will recommend adding browser identification for most CSS3 properties.
Chrome / Safari: -webkit- initial
Firefox: -moz- initial
Opera: -o- initial
IE 9/10: -ms- initial (less commonly used)
How do I learn CSS hack?
Simple. Use Google. That’s right. About 90% of the problems you encounter would have already been solved by other designers.
How about the 10% of the problems that has not been solved?
From my own experience, I will start by changing the HTML framework and avoid CSS styles that tend to generate problems. This will often solve the issue. If the problem persists, then you may have to discuss with the front-end engineers or even use js to solve it.
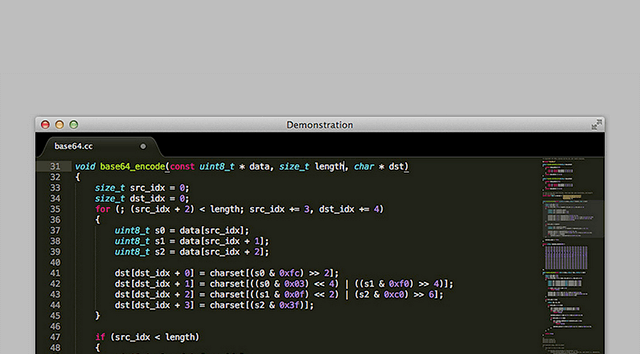
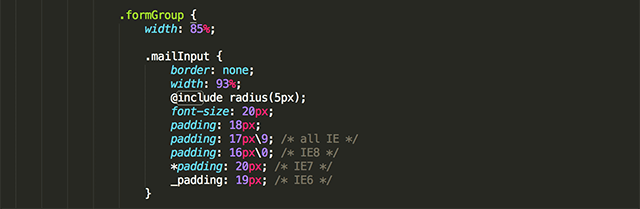
When using CSS hack, I will often make changes directly to the CSS properties (Figure 1) and not hack it under HTML (Figure 2). How about the sequence for CSS hack? Proper CSS grammar should start with the syntax with the greatest compatibility, and gradually narrowing the definitions layer by layer. In other words, when the browser sees something that it does not understand, it can move to the next layer and the next until it sees something it understands. Figure 1 demonstrates the sequence:
▲ Simply add scripts under CSS properties

▲ Annotations under HTML
Most CSS debug used by the browser directly accesses the developer’s toolbox provided in the browser to carry out debugging. I myself would directly enter CSS properties within the developer’s toolbox and check if changes shown on the screen were able to correct previous issues. Once the problem has been solved, you may then open the editor and provide the corrected CSS into the file. Of course, you may try editing HTML frameworks using the developer’s toolbox as well.
How to open the developer’s toolbox:
Windows: F12
OS X: Cmd ⌘ + Option + I
Safari: Safari > Preferences > Advanced > And select the “Developer” tab
Right click and select “Inspect” will also open the developer’s toolbox.
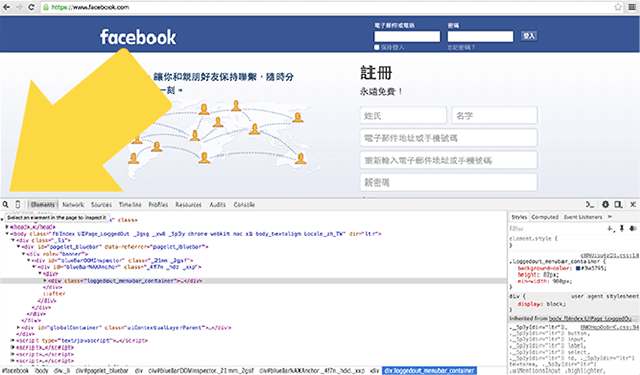
How to use the toolbox (using chrome as an example and demonstrating the means of editing the Facebook login page):

▲ We will use the Facebook login page as an example
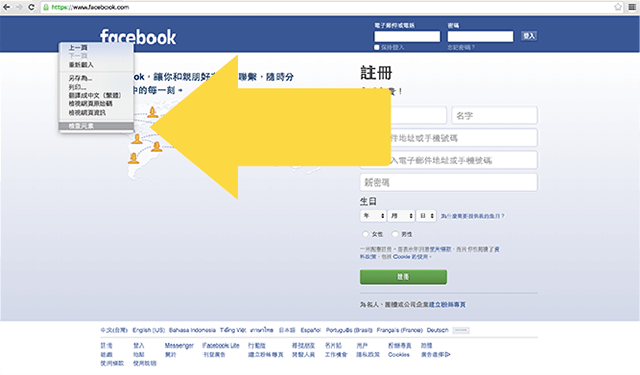
▲ Click on the right mouse button and select “Inspect” or use the shortcut key mentioned above
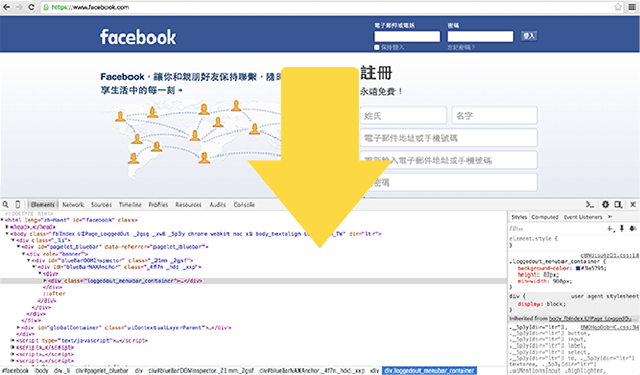
▲ This is the developer’s toolbox
▲There’s a magnifying glass icon on the developer’s toolbox menu bar. Click on that.
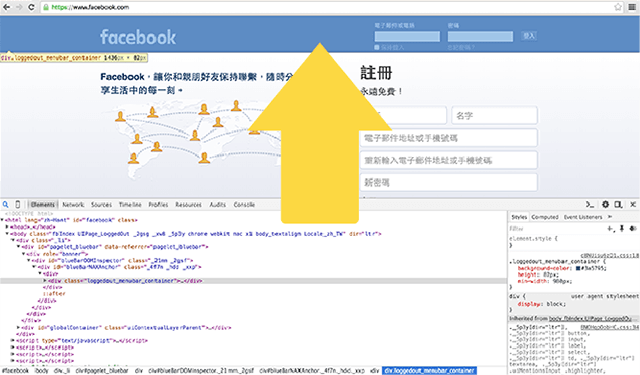
▲ Select the element you wish to edit.
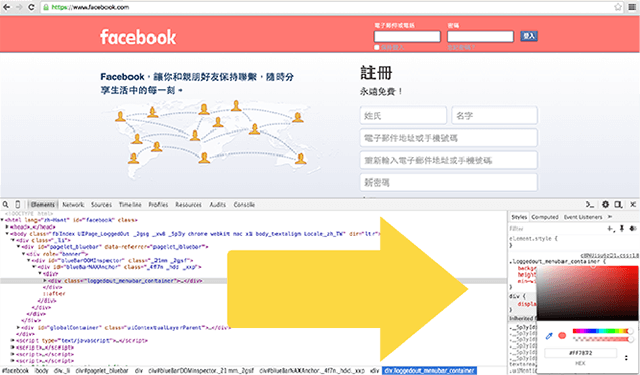
▲ Change the Facebook header color (you can change the color from the top)
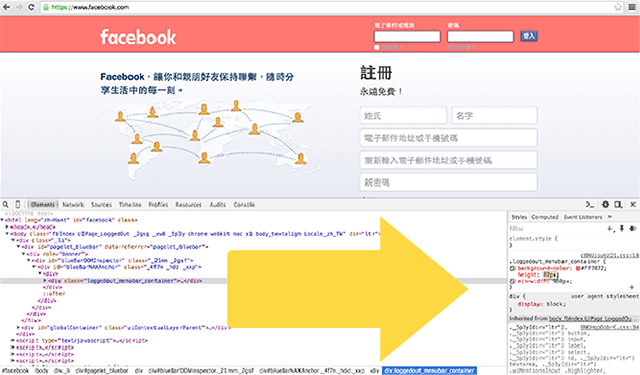
▲You can then adjust the header height.
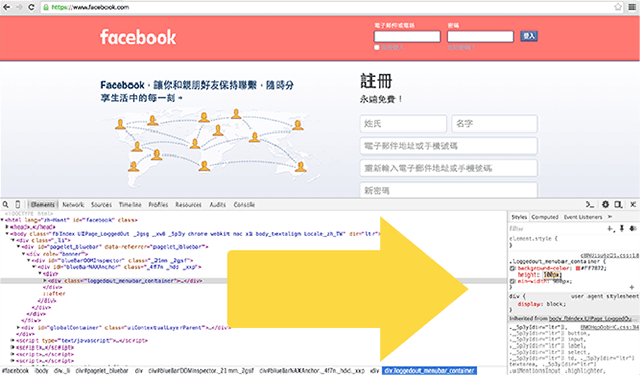
▲Increase the height from 82 px to 100 px.
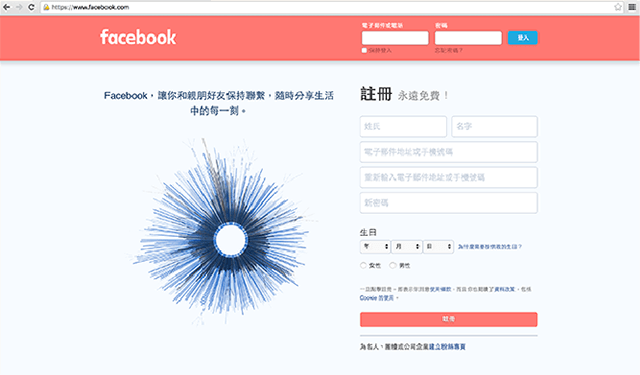
▲A series of edits will quickly allow the designer to achieve the desired interface layout
CSS optimization and maintenance
Designer and engineers pay great attention to program optimization and ease of maintenance. Program optimization can help improve website performance and indirectly enhances UX (user experience). Ease of maintenance is also extremely crucial for group collaboration. For example, if you’re on leave and colleague B is standing in for your job, if you fail to adopt the company’s coding style, then colleague B may have to spend a lot of time trying to decipher your programming language. This may just take a while if he or she is lucky. In some cases, it can take up to an entire day. I will share some of my experiences and lessons learned regarding optimization and ease of maintenance.
CSS optimization
Using Sass for CSS programming allows you to use variables, Mixin, extend, and nesting to achieve great reductions in program lines (by cutting down redundant contents). When I was first introduced to Sass, the commands used deterred me. It simply has too much code for me to like… but once I’ve got into it, there’s no coming back. It’s truly a great and efficient tool to work with. The best function of Sass is its use of variables. This is something that CSS can’t do. Using Sass variables will make website maintenance easier. I’ll provide an example here:

▲See the Pen bVReep by jeremy0417 on CodePen.
Now imagine there’s 30 buttons on the website you’re maintaining distributed in every page. The button must turn dark when the mouse cursor hovers over it. The bad news is that your boss wants you to provide a DEMO to the client in 5 minutes. To solve this crisis, you can simply change $btnHover from darken($btnColor, 10%) to lighten($btnColor, 8%) to achieve the desired function. Here is the demo:

▲See the Pen bVReep by jeremy0417 on CodePen.
There’s more advanced options such as @if, @for, @each, and @while. Of course, I haven’t delved into these functions yet, but those interested should check this article:
Sass control directives: @if, @for, @each and @while
To learn about Sass, I will share the two channels I use: front-end developer groups and online learning materials.
Front-end developer groups:
Front-End Developers Taiwan
Taichung Frontend Group
Kaohsiung Taiwan F2E
Online materials:
Sass & Susy manual
Sass official documents
mixin library for Sass
Relationship between Sass and CSS (online practice)
Sass Tutorials (online learning videos)
There’s actually quite a lot of online resources to work with. Once you have mastered basic Sass, I recommend you keep looking for relevant source codes to emulate. If you do encounter real problems, you may try asking the gurus in various front-end groups. I hope fellow designers can give Sass a shot. Once you try it, there’s no going back.
Another is graphic processing. Slicing pictures to the required dimensions and handing them over to the engineer are easy, routine tasks for designers. But… do you know that there’s still room for compression for the dissected pictures? That’s right! There’s free tools online that allow you to achieve great compression of XX% without loss of detail such as compressor.io (highest compression ratio of 90%) and TinyPNG (that can achieve 50% compression for png files). I personally use TinyPNG (this can be used for both jpg and png files). Some people may think compressing is an annoying chore as it means that you have to save the file a second time after slicing. But the compression ratio is really significant and is a good habit to have. So just keep calm and compress away.
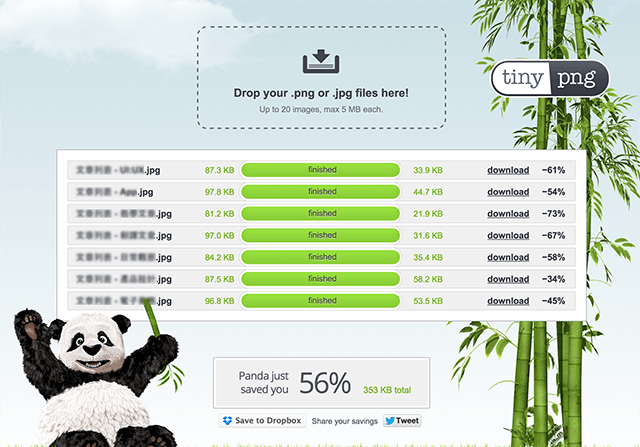
▲Using TinyPNG to compress pictures
In addition to picture compression, there’s a lot of other graphic tools out there such as CSS Image Sprite. This tool takes thumbnails and icons to assemble a picture. Right, so how useful is this, exactly? To servers, users can simply make a single request to the server, helping to speed up web surfing. The following picture shows CSS Sprite used for Pinterest and Facebook.
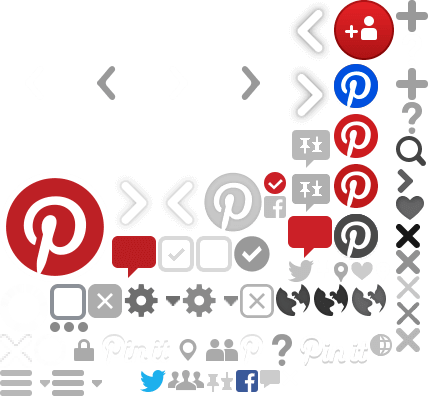
▲Pinterest CSS Sprites
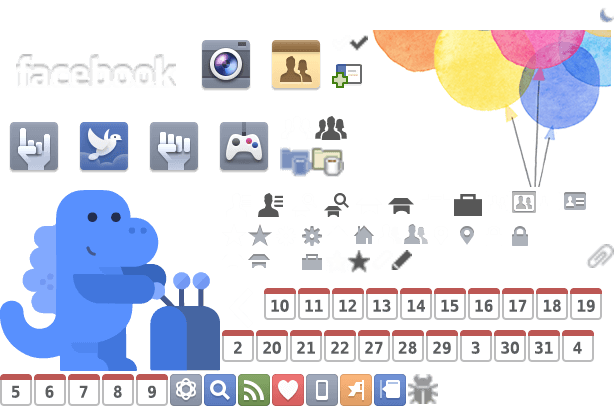
▲Facebook CSS Sprites
How do we generate CSS Sprite? I would often use Photoshop to create a picture using various icons. There’s also a lot of similar services online. Feel free to check out CSS Sprite on lessons of assembling backgrounds using multiple pictures to improve website performance. You may also check CSS Sprite Generator offered by Google.
When looking for CSS Sprite templates, however, I’ve found that many websites have changed icon to icon fonts. I won’t elaborate on icon fonts in this section. I believe you can easily Google this and find a lot of information about it. I myself selected Font Awesome because it is also supported by Photoshop / Sketch App. For details, please check out this article: Boost your efficiency in webpage designs by using Icon Front in Photoshop!
Ease of maintenance for CSS
Ease of maintenance of CSS, in layman’s terms, is to make sure that CSS is written in programming scripts and logic that are understandable to other people. Colleagues charged with opening and editing your CSS scripts would have a much easier time if they are easy to maintain. I will share some of my experiences and thoughts on CSS framework and nomenclature.
We shall start with file framework. I would dissect SCSS files so that every .SCSS functions are independent from each other. If layout UI must be adjusted, I can simply work on the separate .scss to quickly implement the required changes. The following describes the framework for .scss file separation:

From the HTML, we can see how .scss files can be classified (by project size or personal preference). When I first started learning this, I only divided .scss into 2 files: mixin and style. However, the style.scss file would eventually end up with 800 lines of code (with 1 index and more than 20 pages of material). It was not until I’ve read up about CSS file management techniques shared by other people that I’ve realized I was being a most unfriendly programmer in terms of project management. Furthermore, the time I spent reorganizing my files will allow easier maintenance in the future. This compelled me to start learning CSS file classification techniques. I recommend fellow readers to check out the article titled 30-day Mastery of Sass grammar – (18) Planning your Sass structure. The key recommendation is to go ahead and try it. Only through actual practice would you come to realize the concepts that you’re not familiar with. You can then look up for more information, try it again, and deepen your mastery over CSS classification.
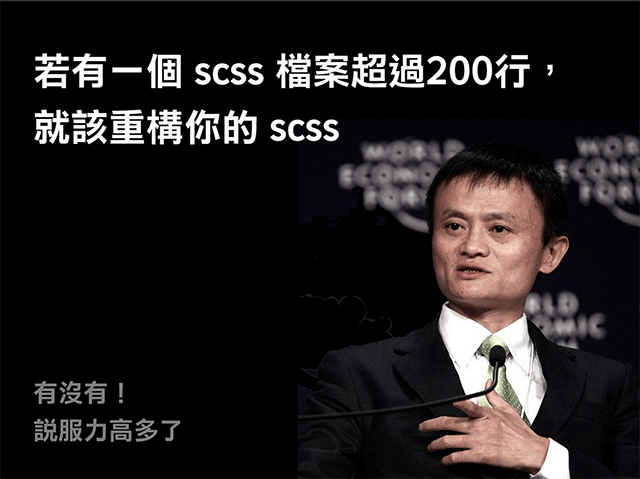
▲Screenshot from:https://speakerdeck.com/evenwu/css-dang-an-guan-li-ji-qiao-fen-xiang
You may be confused why I’m talking about SASS at one moment and SCSS in another. Was there a typo or something? The truth is that SASS is capable of supporting 2 types of languages. In SASS, indents are used to replace brackets to provide a cleaner script. However, people may not be used to this at the beginning. The other script is SCSS which is more comparable to CSS scripts as brackets are retained. You may save CSS scripts as .scss, but that would be pretty meaningless (your ultimate aim is to leverage the essence of SASS with variables, mixin, extend, and nesting elements).
Another lesson I’d like to share about ease of maintenance would be nomenclature. I feel that poor nomenclature is something that negatively impacted work efficiency. We often spend a lot of time thinking about names and this often disrupted our coding process flow. This is why I started researching and studying nomenclature used by other people. The following lists the naming rules that I commonly use:
Overall framework: header / main / footer
Functional names: banner / nav / container / sidebar
For container widths: xxxContainer, such as: navContainer / mainContainer
For group elements: xxxWrap, such as: navWarp
Sub-elements: subXxxx, such as subNav / subMenu
Common elements, such as: logo / mail / btn
To name other elements, simply reference the principle of naming by function in order to clearly specify the type and purpose of the element. Avoid using meaningless names such as class = “1” or class = “aaa”. For id and class nomenclature, I tend to use: id = “id_name” class = “className” formats.
When should you use id? And when should you use class? Simply put, you would use class for CSS styles as these styles may be used repeatedly. id, on the other hand, is independent and cannot be repeated. Hence, id is often seen in “overall framework name” or reserved for javascript.
CSS Framework(Bootstrap)
To be honest, I stopped using bootstrap after trying it once. It’s not because it’s useless, but once I got to know its framework and logic, I still preferred my own style (I’ve already established my own framework and logic by then).
Bootstrap, in my opinion, must be learned because a lot of people are using it. It is very likely that you’ll need to edit or maintain webpages written using bootstrap. Knowing bootstraps will make things a lot easier for yourself. Another reason for learning about bootstrap framework principles is to gain better familiarity with CSS and add more CSS coding options to improve your own skills (remember, don’t become too dependent on this).
You will spend more time if you don’t use existing CSS Frameworks and instead choose to make your own customized frameworks from scratch.
Extended reading:
Should I start from scratch, or use CSS framework?
BOOTSTRAP RWD usage methods and principles
Bootstrap CSS – Chinese manual
Version control (git)
git may be too complicated for most UI designers. However, git proficiency will help improve program development and collaboration. My own git expertise is only enough for me to work smoothly in a team. The framework environment for git contains too many “text (code) and steps”. However, nothing should be too difficult for an eager learner. Still, as a designer used to large amounts of graphics, the imposing amount of program codes on the terminal can be quite bewildering. There’s also branch, release, and rebase. These parts are often taken care of by professional RD people in our company. Nonetheless, it won’t hurt trying to work with git on your own (where messing up would not be an issue). I will be sharing some of my learning experiences on git:
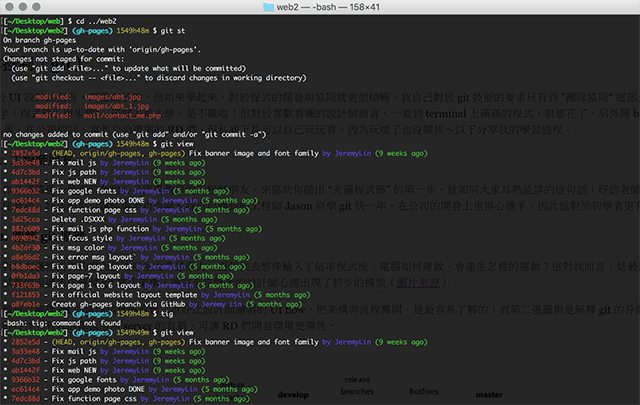
▲Screen capture: A terminal filled with program codes
step1. Having an engineer pal
First and foremost, you must have a patient friend in the engineering department willing to spend the time with you to help you along as you take baby steps towards intensive programming. Everyone should be familiar with the comment: Great teachers allow you to reach great heights. Lousy teachers remind you of hell. Great teachers will make these lessons easier and enjoyable. I have been learning about git with the help of Jason, an engineer, for nearly a year. Jason is very well aware of the needs of first-time learners, and his lessons allowed me to do a better job in company projects.
step2. Dissecting the principles of git
Screens filled with code are unlikely to elicit any creativity for designers. We’re simply unable to know how the computer will work or fathom the results generated by all these lines of code. That was the most difficult part for me. This is where an engineer comes in handy. They will try to explain how git works using a graphical workflow. These representations allow even the most clueless designer to have an initial idea and model on how git works (source).
The first picture can be used to explain the operational framework and workflow of git. This is comparable to the separation of framework and process illustrated by UI flows created by the designers. The second picture explains the distributed version control system and the decentralized characteristic which effectively reduced remote server loading and allow RD teams to create a more flexible environment.
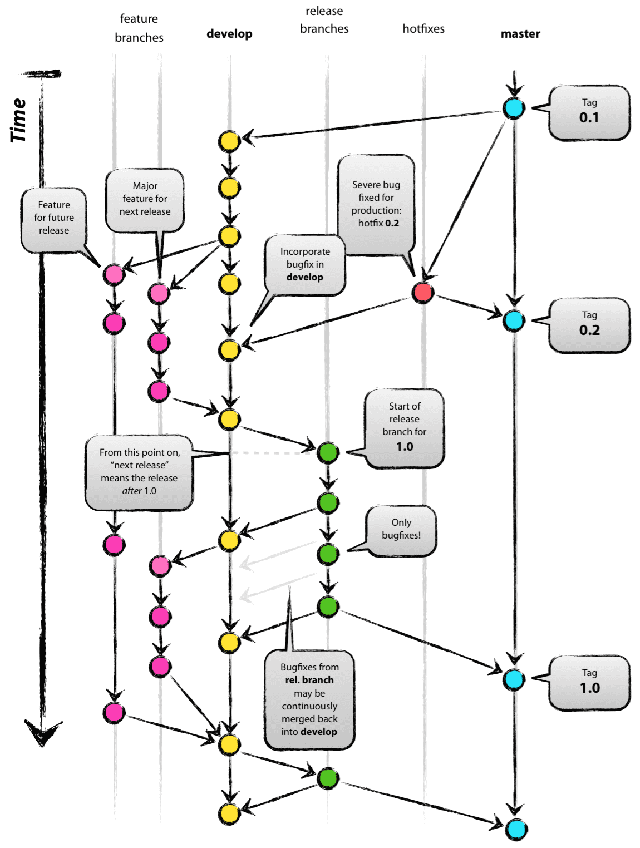
▲git flow model
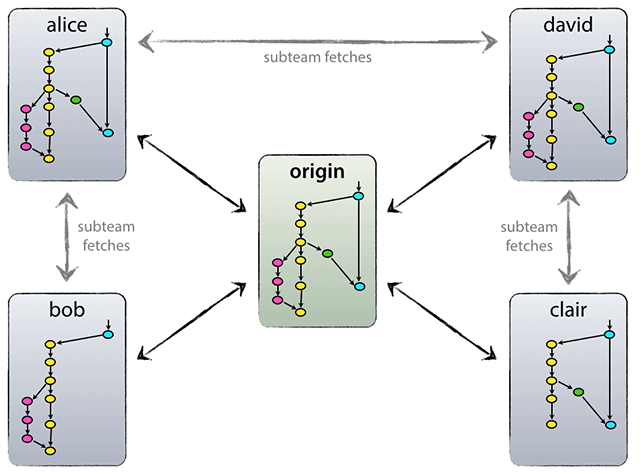
▲Concept diagram of the distributed workflow of git
Extended reading:
Pro Git – Traditional Chinese version
Introduction to Git – Easy Enough for Monkeys
Git flow developing workflow
Atlassian Git Tutorial
step3. Memorize general workflows
I asked my engineer friend to carry out the process starting from project establishment all the way to pushing the program codes to a remote target once through (without considering other contingencies). I recorded every process on paper in detail and specify the meaning behind every step. I also recorded the meaning and function of every line of code. Knowing these will make it easier to apply them accordingly. I also asked about the meaning behind the program codes. For example, I asked why some lines do not contain -f that is seen in other lines. And what do -f and f stand for in English? These are questions that you should ask. The following lists some of the most basic procedures that I have acquired in my early lessons:
1. git co master
2. git pull
3. git co feature XXXX (RD has developed the branch, allowing me to skip to this part directly)
4. Direct development
5. git st (check the files that have been edited)
6. tig (provide a quick look through of edited files)
7. git add (add edited files)
8. git commit (commit the changes at every phase and specify what the committed changes are)
9. Continued development
10. git st (look for the files that have been edited)
11. tig (quickly browse the contents of the edited files)
12. git add (add the edited files)
13. git commit (commit the changes once more. If you feel that you have attained the desired level by this step, you may upload the code to the remote destination)
14. git pull –rebase (a personal habit of mine, this is designed to avoid conflicts)
15. git push (take the code developed and send it to a remote terminal)
step4. actual operations
I first began participating in the company’s development projects and contracts (the prerequisite to this is that the engineer has helped me establish my work environment and authorization). I then followed the process flow described in step3 one step at a time. My engineer friend emphasized that I must notify them “for final checks before pushing”. Once everything has been verified, I would push the file accordingly. Naturally, the engineers are worried that newbies may disrupt the entire development process (such as by accidentally deleting some programs or files, or forcibly pushing the programs without merging).
step5. learning from mistakes
You will encounter a lot of problems during actual operations. When this happens, you’ll have to ask (pester) a fellow engineer to find out what happened and solve the issue. Asking for help will improve your understanding about git. I’m not the brightest person around. I had to ask for help on multiple occasions for similar questions.
1st time – Still very confused
2nd time – Somewhat less confused, but the problem still pops up when I’m the one doing it.
3rd time – I can now handle similar situations, but strange events are likely to happen.
step6. play around with GitHub and open a GitHub project
I first started handling git development environments for the company, so I hardly went to GitHub. In order to acquire better understanding on the essential aspects of git, I tried using GitHub since it doesn’t hurt when I mess up and I can simply reset the whole thing. GitHub allows designers to practice git skills and serves as a great place to host collections of work (github.io). Designers can use these to practice HTML / CSS / git and upload their work to github.io. This is really easy to do, and can be conducted in a stable environment and free space offered by GitHub. Additionally, you may work on a group project with a few friends. I believe that remote collaboration and joint development are the fastest way to improve your skills.
Post-script
1. Being able to use HTML / CSS terms when discussing about layout drafts with front-end engineers (if you like programming and codes, you can keep going down this list)
2. Attempt to generate your own design draft using HTML / CSS independently (writing code is like designing… they both feel real good if they turn out right. If you achieve this, go down the list)
3. Optimize your own HTML / CSS coding techniques and try to establish a passive website (those who are willing to work on their coding quality and try different coding methods can keep going down this list)
4. Add some jquery codes in webpages you’ve independently created to introduce dynamic behaviors (those who are willing to study jquery articles and learn how to change parameters can keep going down this list)
5. Add git development processes (I personally feel that git is a super-effective tool to use. Keep going down this list)
6. Learn javascript (if you have enjoyed some success in this phase, you may consider taking on a new career path – front-end designer) If you took up the career of a front-end designer, then you would need perform more technical research (I have only reached step 6.001 and is still struggling in this quagmire)
7. Regardless of your learning outcomes, I believe that you’ll be able to establish effective communication with RD with this knowledge as you can now view issues and disagreements from the RD’s perspective. You can then find a mode of presentation that is acceptable by both the designer and the engineer (but always remember to stand your ground for the sake of good design).
About the Writer
Design Tongue / Jeremy Lin
Design Tongue is a content platform focusing on user experience issues, including UI, interactive design, user experience, product design trends, and service designs in an attempt to enable the readers insights into the designer’s mind and promote design thinking.